If you do not have a 1Wire Cloud Phone account, please contact our sales team
How to use Zoho telephony with 1CXpro (step-by-step guide)
When implementing your 1CXPro for Zoho extension, you will need to complete the following steps (using Google Chrome as your browser).
Sign-up for the extension
a. Go to our home page and complete the form
b. An agent will call you about your needs and complete the initial sign-up information
First-time login
a. Credentials will be emailed to you (Email and Password)
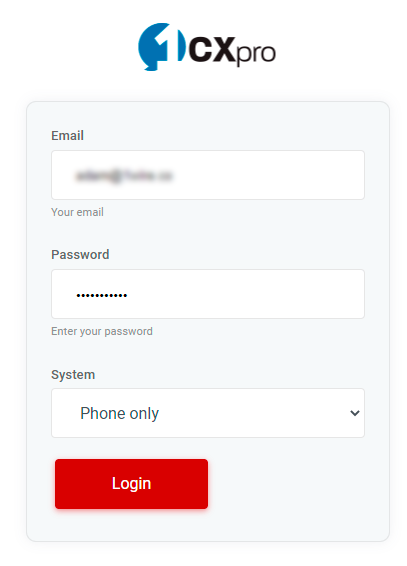
b. Visit https://phone.1CXPro.com
c. Enter your email and password, leave the System option on phone
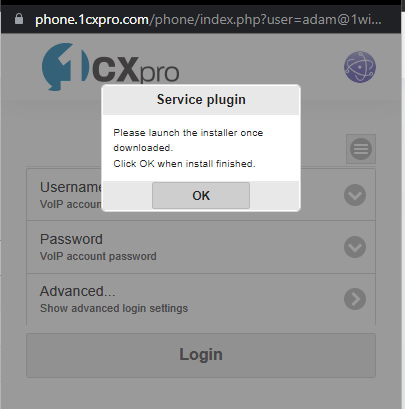
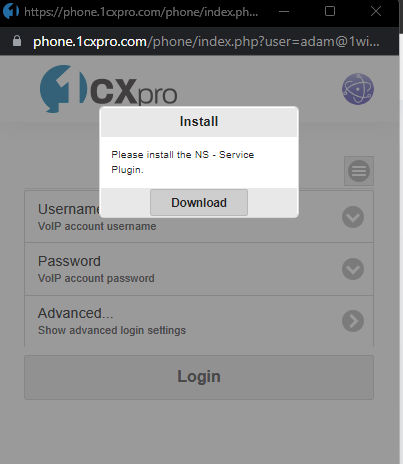
You should see a pop-up window (Please follow these instructions if you do not)
d. Follow the download instructions for the NS Plugin
e. Install the plug-in
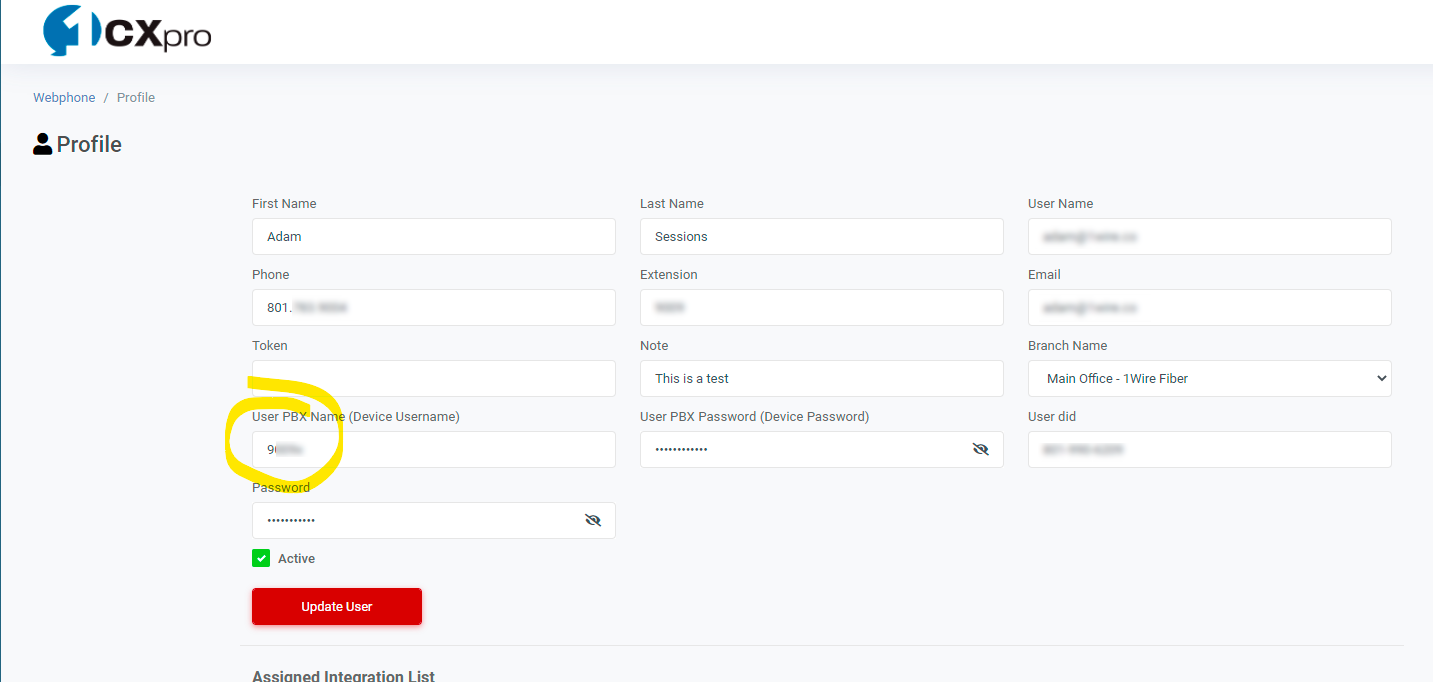
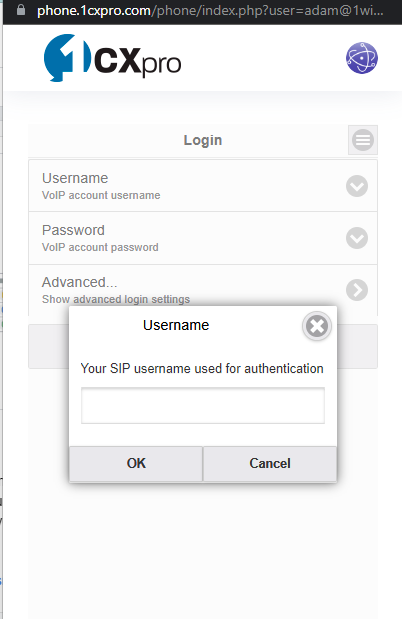
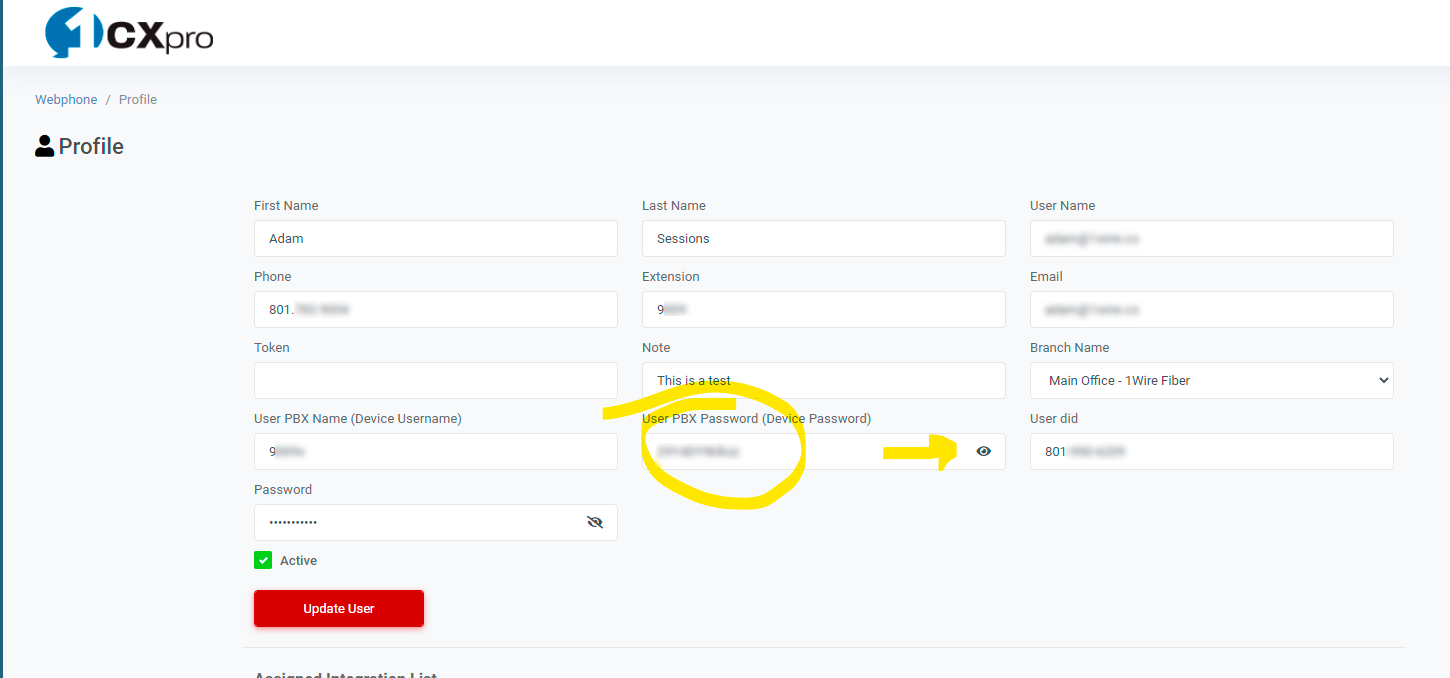
f. Click Username and enter the Device Username from your Dashboard
g. Click Password and enter the Device Password from your Dashboard (click the eye icon to reveal the password)
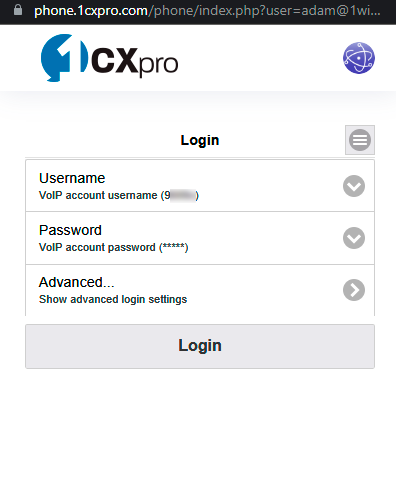
h. Now Click Login
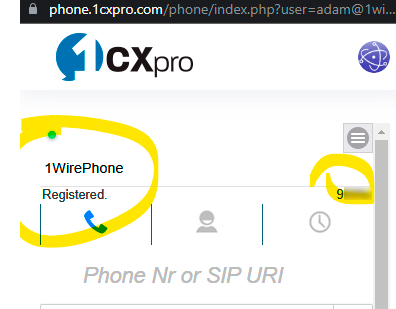
i. You will now see Registered and your Device Username
j. Close the phone window
Now you can use the Zoho Interface and/or your phone to log your customer calls.
For further help, please contact customer support: support@1wire.co
Initialize Zoho and/or Daily Login
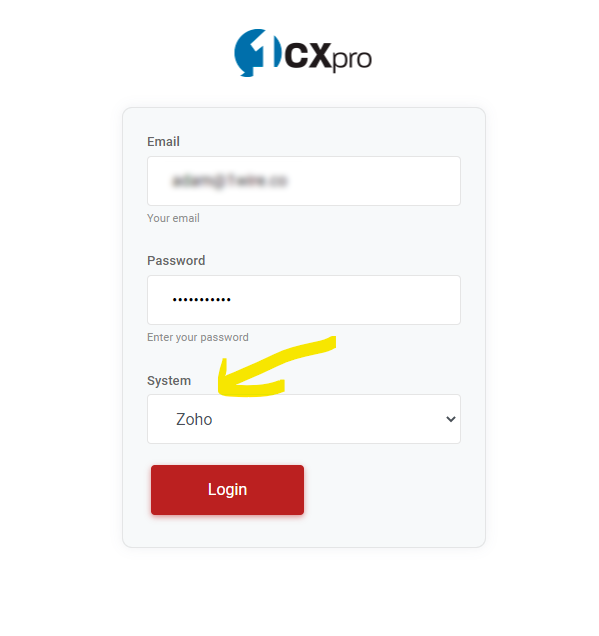
a. Visit https://phone.1CXPro.com
b. Enter email and password
c. Choose Zoho as the System
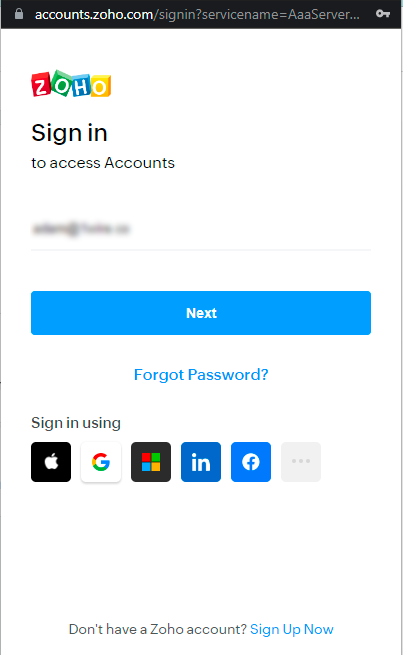
c. If not logged into Zoho, do so now
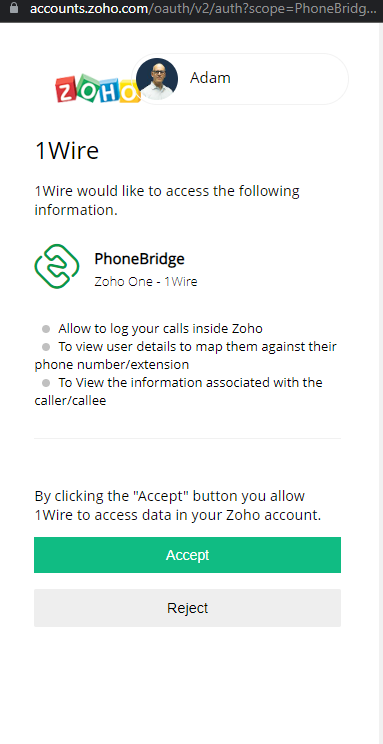
c. If logged into Zoho, allow permissions
No Pop-up Window – How to Fix
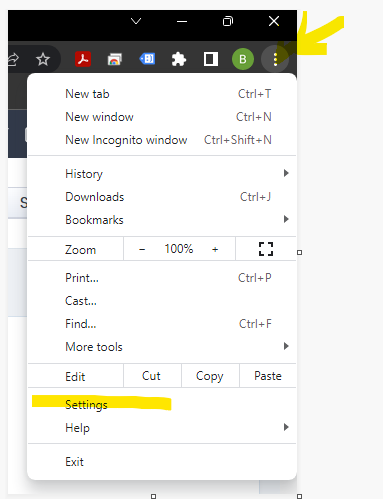
a. Click on the three dots near the top right side of your Chrome Browser
b. Choose Settings
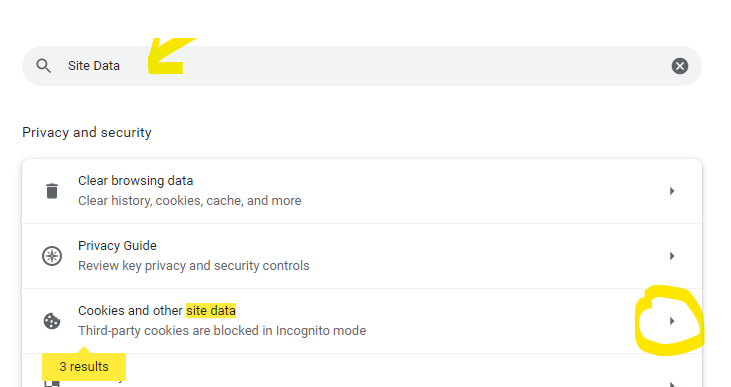
c. Type in the Search Area “Site Data”
d. Choose “Cookies and other site data”
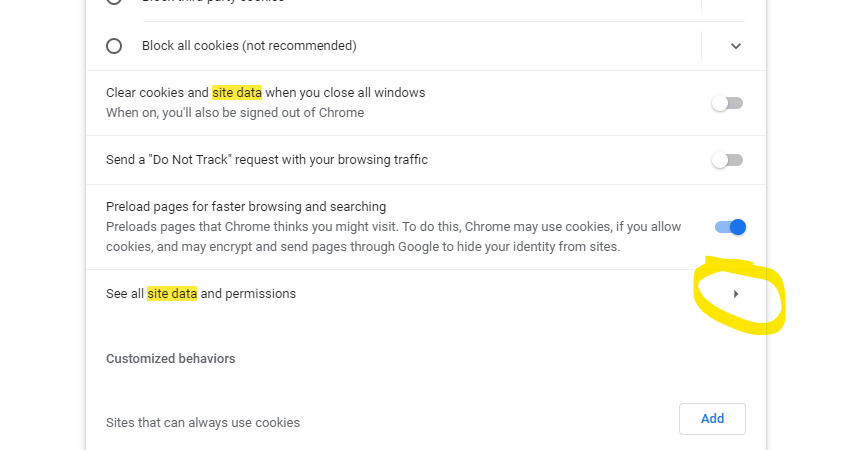
e. Scroll down to “See all site data and permissions”, click arrow to the right
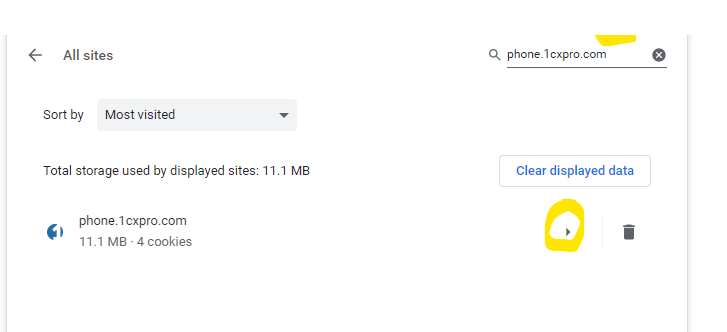
f. Search “phone.1cxpro.com”
g. Click on the arrow to the right
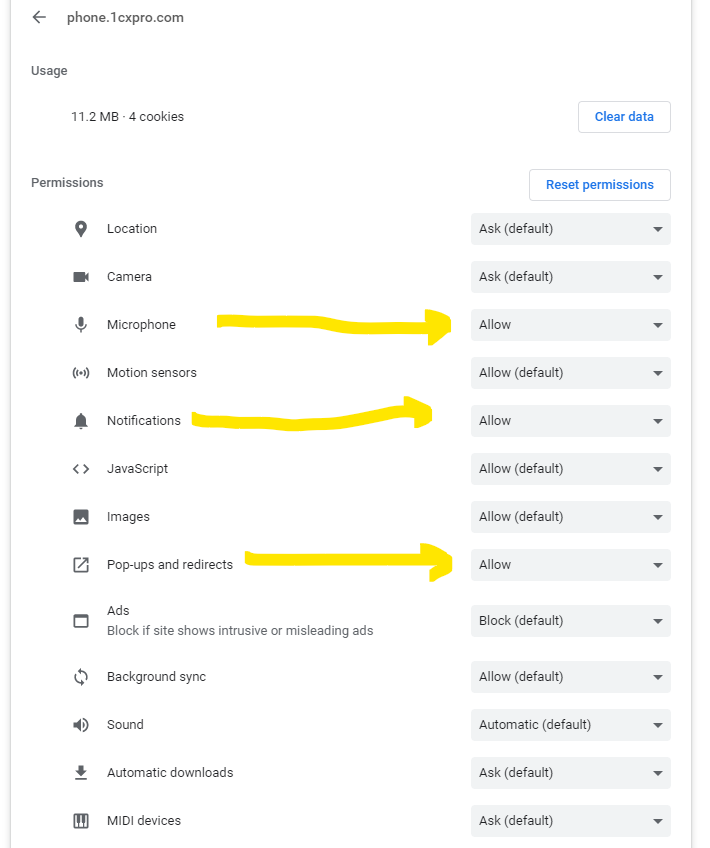
h. Change the setting in the dropdown to “Allow” next to the following:
- Microphone
- Notifications
- Pop-ups and redirects
- Window management
i. Close the Settings tab
k. Begin with Step 2 above

